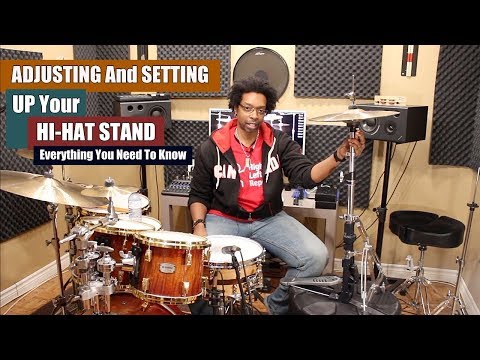
If you’re new to drumming, setting up a hi-hat stand is undoubtedly one of the most confusing parts of putting a drum kit together. It has multiple parts, and if you don’t set them up just right, the hi-hats won’t work as they’re supposed to.
This guide is here to show you how to set a hi-hat stand up so that it sits solidly at your kit. We’re also going to show you a few ways of altering the hi-hat stand setup so that you can get some unique sounds. There’ll be value here for everyone, from beginners to more experienced players. Here we go!
The Basics
If you’ve just unboxed a fresh drum set, the hi-hat stand will be broken down into a few different pieces. If they’re not already together, make sure that you find a tripod base with a pedal, a thin piece of metal known as the rod, a thicker metal tube that fits the tripod base, and a small screw device called the clutch.
Once you’ve found those things, here’s how you set them all up:
Open the Legs and Set the Pedal Up
The tripod base will have a wingnut at the top of the legs that you need to loosen so that you can stretch them out. Stretch them out enough so that the stand feels solid on the ground, but don’t stretch them out too much so that they’re sitting flat.
Once you’ve done that, place the hi-hat pedal and then connect the two securing rods to their sockets. If you don’t click those in on each side, the pedal will wobble around when you play it.
You can then adjust the chain of the pedal to get a comfortable height setting. You’ll need to find a good middle-ground, as having it too low to the ground will stop you from getting loud hi-hat strokes. Having it too high will require you to use too much energy to close your hi-hats.
Fasten the Hi-Hat Rod
Now that you have the base of the stand secured, you can build on top of it. The next thing to do is to attach the thin rod. The rod will be the thinnest piece of hardware out of your whole kit, and it will have a screw on the bottom that can be attached to a piece at the top of the tripod base.
Make sure to attach this thin rod first before you do the thicker tube, as most hi-hat stands don’t allow you to do it afterward.
Also, be careful when moving your kit around, as hi-hat rods bend very easily if you place them in risky positions.
Mount the Thick Tube
Once the hi-hat rod is tightly secured, you can place the thick tube piece over it. You’ll then need to use the next wingnut to hold that tube in place.
This is where you can control the height of your hi-hat stand, so set it at a height that feels comfortable to you. The top of this tube is where the bottom hi-hat cymbal will rest.
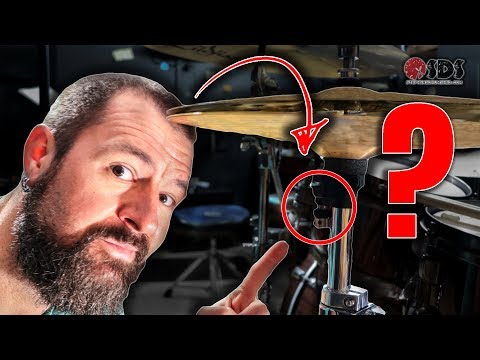
Most hi-hat stands will also have a memory lock that you can use on this tube. When you tighten the memory lock, it will allow you to keep the same height setting when you dissemble and reassemble the hi-hat stand.
The memory lock will require you to use a drum key, and it’s the only part of the hi-hat stand that needs one. This is where you’ll learn that you should always have a drum key lying around, especially when dealing with drum kit hardware.
Place the Bottom Hi-Hat
Now, you can place your bottom hi-hat at the top of that thick tube. It will have a round plastic piece with a spring underneath.
Just make sure that there is a large felt resting on top of that plastic piece. The felt takes all the vibrations from the hi-hat cymbal, and it protects it from getting scratched. If the felt isn’t there, your bottom hi-hat will be in danger.
The spring underneath that plastic piece will allow you to adjust its angle. You may be tempted to make it as straight as possible, but you actually need to put it at a slight angle. If it’s straight, your hi-hat cymbals will form a vacuum when they’re closed, and you won’t get a solid sound. The angle helps the contact between the top and bottom hats.
Attach the Top Hat to a Clutch
Look for the hi-hat clutch, remove the bottom metal piece, and then place the screw through the middle of your top hi-hat cymbal. Once it’s through, place the bottom piece back on to lock the hi-hat cymbal in place.
Now, take the clutch and place it on the hi-hat rod. This is where you can set the height of your top hi-hat cymbal.
You need to put it at a height that will allow you to close the hats easily with your foot. If the top cymbal is too high, you won’t be able to press the hats together. If it’s too low, you won’t get enough volume. It’s a similar process to adjusting the pedal height, so you need to find a balance between both pedal and the top hi-hat height.
Getting Different Sounds
Now that your hi-hat stand is set up, there are a few things you can do to get different sounds. Most will require you to buy something extra to add to your hi-hat setup.
Adjust the Top Hat Height
While your top hi-hat needs to be at a specific height to work comfortably, that height has a workable range. If your hi-hats are more open, you’ll be able to play washier and louder tones. They’ll sound more aggressive, making this a good setup for drummers playing rock and metal music.
If you position your hi-hats closer together, you’ll get softer sounds that are much lighter in the way they feel. You’ll find jazz drummers doing this, as their top and bottom hi-hats are usually touching at all times, even when they’re being played open.
Stack Smaller Cymbals
Do you have a splash cymbal lying around? If it’s smaller than your hi-hats, you can stack it underneath the bottom hi-hat cymbal, and it will completely change how your hi-hats sound. You’ll get a stronger tone due to the bottom hat having more density. The tone will also depend on what qualities the splash cymbal has.
You could also place the splash on the top hi-hat, but it lowers the playing area, so most drummers prefer to place splashes on the bottom.
Use a Tambourine
If you take a standard hand tambourine and rest it over your hi-hats, the rod will keep it from falling, and you’ll get the added bright sounds of the jingles whenever you play the hi-hats. This makes the hi-hats sound a lot livelier, and you get slightly more resonance from those jingles.
If you don’t want to use a loose tambourine, you could get a dedicated hi-hat tambourine that is designed to attach to the top of a hi-hat rod. These tambourines work wonderfully, and some even have settings where you can turn the jingles off.
Swap Out the Top or Bottom Hi-Hat Cymbal
Hi-hats are always sold in pairs, and they’re designed to have very specific sounds when they work together. If you want to change those sounds, you could try getting a cymbal from another set of hi-hats and subbing it in.
It will have different tonal qualities, so you’ll get a unique sound from your newly modified pair of hi-hats. You could even use cymbals that aren’t designed to be hi-hats, as long as they’re the same size.
If the cymbals aren’t the same size, you’ll have one cymbal overlapping the other, and it will feel very uncomfortable to play on the hi-hat stand.
Use Auxiliary Hi-Hats
The last thing you could do is use an entirely different set of hi-hats. Auxiliary hi-hats are often smaller than the standard 14-inch ones, and you can place them somewhere around your kit. You’ll be able to play the same patterns that you would on your regular pair, but you’ll get a tighter and more distinct sound.
If you want to have an auxiliary pair of hi-hats that you can open and close, you’d need to get a remote hi-hat stand with a hydraulic pedal system. Otherwise, you could just mount them to a standard cymbal arm and not have the ability to open and close them.
Final Thoughts on How to Set Up a Hi-Hat Stand
Many drummers don’t realize just how much you can do with a stand to get different sounds. Modern drummers love adding things here and there to get the sounds that are so often used in popular music.
If you’re a new drummer, we suggest that you just focus on learning and memorizing how to set a hi-hat stand up nicely. Once you have a bit more experience and can play a bunch of different things, then you should experiment to see what other sounds you can get from your kit.